What is balance in an Image?
Out of balance can be anything in the picture that looks too heavy on one side of the picture or it can look top heavy or bottom heavy
Dark is heavier than light
Big looks heavier than little
Closer looks heavier than further away.
If you took the picture and balanced it on a knife blade at its center point does it look like it would tip one direction or the other. ( big dark rock on one side and open lawn on other side. ) ( Big dark stormy sky 3/4 ths of picture 1/4 light sandy beach ) ( three balls of equal size - one far back on left - one half way to front in center - one close up on right )
We use groupings a lot to balance pictures - three little things on one side to balance one big one on the other side. Also arranging people into triangles adds balance (one standing behind two seated - one on the third step to the left, one on second step a little to the right, third one on first step to the left of second one).
I think a lot of the picture straightening we do on our walls has more to do with the visual balance of the picture than it's relationship to straight with the mopboard.
Monday, April 28, 2008
Photo Book Club Anyone???
We talked about doing another homework assignment and a new album to put it in during our classes, and that idea has now sort of snowballed! Kathie and I were talking last week and she thought you all might enjoy doing a new assignment and new album every other month, a sort of "Photo Club". We were thinking that everyone would get their new homework assignment a month ahead of time and that way you could all bring your photos into class and share them with the others while we make the new album. This Photo club would only be available to the 7 gals that already took The Heart & Soul of Photography class. So what do you think? Please let Kathie or I know if you are interested in this idea.
 There are enough "pages" for 32 photos!!!!!!
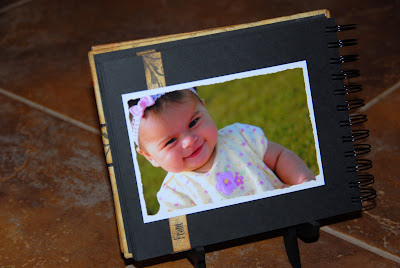
 I love the fun and elegant details of the pages. And did you notice. . . NO INK anywhere on this book!
 Well Ladies I hope you are all still enjoying your cameras and keeping them out at reach!
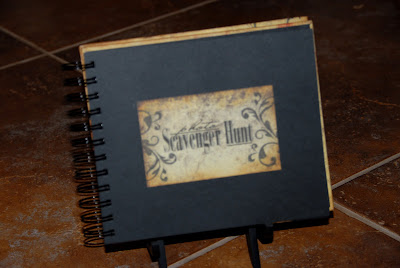
Below you will see the Photo album I have planned for out next assignment class - or our first Photo Club Meeting.
 There are enough "pages" for 32 photos!!!!!!
 I love the fun and elegant details of the pages. And did you notice. . . NO INK anywhere on this book!
 Well Ladies I hope you are all still enjoying your cameras and keeping them out at reach!
 Be sure to let us know what you think about the Photo Club.
Quote of the Day
Photography records the gamut of feelings written on the human face - the beauty of the earth and skies that man has inherited; and the wealth and confusion that man has created. It is a major force in explaining man to man.
Photography records the gamut of feelings written on the human face - the beauty of the earth and skies that man has inherited; and the wealth and confusion that man has created. It is a major force in explaining man to man.
- Edward Steichen
Tuesday, April 22, 2008
Check Out the New Links
I just wanted to remind you all that I added some new links here on the blog. On the right hand side you will find two new Link sections.
1. Tutorial Links - Is right after the Photo Gallery Links,
2. Misc Sites I love for processing my images and storing them - Is right after Some of my Favorite Images
I will be adding more shortly. Keep checking the right side bar, as I will continue to add images and information as we go along. This way you if you wanted to refer back to something you don't have to remember what day it was posted on. I hope all of this is helpful for you.
Have a great day - I am off to the Creative Quest here in a little bit to take a class!
Talk to you all soon
M
Monday, April 21, 2008
Session Three Notes
This week is all about Post-Camera editing. In short we will talk about things to do with your Photos AFTER you have taken them. We will touch on some of the technical and creative things you can do once you have captured that perfect image.
Resizing and cropping your images -
When your camera records the image you just took (we will be talking digital cameras here) it saves it as a “file” much like the files you save on your computer (remember your digital camera is basically a small computer). This file has a specific proportion and size. It is important that you understand this when you are shooting so you can get the image you want in the print size you want.
Most digital cameras (and film cameras) store an image that is either 8x12 or 4x6. What you have never heard of an 8x12? That is because it is not the standard frame size so most labs and developers automatically crop your image to that standard frame size of 8x10. When they do this you lose an inch off of the top and the bottom of your image. So you need to keep this in mind when you are composing your shot. If you know you are only going to print 4x6 prints, or if you like 8x12’s for scrap booking you do not have to worry about those two inches. But if you want a different sized print you need to remember to leave some open head and foot space in your composition.
Below you will find some examples of this.
 Here is a picture I took of my Mother. This is the sample we will work with for this discussion.
 This is an 8x12 photo with an 8x10 of the same photo on top. Notice how the 8x10 chops her off at the knees and cuts off some of the tree? Had this been a close up of her face it would have taken off part of her hair and her chin!
 This is that same photo again but as a 5x7. Notice we gained some of her legs but not all and still lost some tree tops.
I hope you will remember this when you are taking your next set of photos.
For you mathematicians here are the aspect ratios -
8x10=4:5
4x6=2:3
8x12=2:3
Notice that the 8x12 & the 4x6 are the same ratio. That means that you will get the same image in both of these print sizes. Also a 5x7 and a 2.5x3.5 wallet size are the same.
It is usually cheapest to mat and frame if you stick to the standard sizes of 4x6, 5x7, 8x10, 11x14 etc. If your image will be framed think about that while you are behind the camera (if you can) - also allow some space around the edges for matting or if the frame is ornate. Mats and frames tend to take up some of the image area. Also remember that adding post camera borders (like white or torn borders at the lab) will crop your photo about ¼” on all four sides. So be sure this wont be an issue for your image when you choose these.
Now that you have had a crash course in image proportions and ratios, let me tell you one more thing about sizing your photos. Digital images (not film) do not exactly produce the 2:3 ratio. “Oh No” you say. . . Don’t worry it is not that big of a difference but it is something you will want to know. Typically in a printed 4x6 image you will lose about ¼” on the top and bottom of your image. Which is not a huge difference but something you want to know when you are zooming in close. You can check the actual size your camera produces by taking a photo and then opening it up in your photo editing software, like Photoshop Elements (or whatever software came with your camera) and clicking on “resize image” look at the size in inches there. This is the size file your camera takes. Now you know how much you need to adjust your personal shooting habits.
Here are a few more tidbits about digital image sizes in case you want to know them. . .
There are 4 ways to measure digital images:
1 - PC = Pixel count - the width and height of image in pixels
2 - PPI = Pixels per Inch ( sometimes this will be called dpi - dots per inch but ppi is more technically proper - dpi is for dots of ink in printing) - what it downloads at
3 - Inches
4 - KB = file size
These four measurements can change all at the same time - or some of them can change independently of the others - or change and only effect one of the others. Understanding when and why to change which ones is important for getting the results you want.
In PhotoShop software, to find out what your numbers are do the following:
*Open Image -
*Resize -
*Image size.
Three of your measurements are there.
File size can be found in Windows by right clicking on the image and then clicking on Properties.
These are minimal pixel counts for printing a quality image:
640 x 480 - wallets, 2x2, 3x3, 4x4
1024 x 768 - 4x6
1152 x 864 - 5x7
1600 x 1200 - 8x10
2000 x 1500 - 11x14
3000 x 2000 - 24x36
Okay, enough of that technical stuff! Let’s move on to the more FUN & CREATIVE things you can do with your photos!
The most important thing you can do with your photos is PRINT & DISPLAY them!!!!! I cannot say enough about this. You took a photo for a reason, don’t let them just sit on your memory card or in your computer.
Print them!
Frame them!
Display them!
For a long time I only printed my photos for albums, which few people ever look at. Then I started scrap booking and put them in there. They got looked at more in there but still. . . Then one day I thought, why do I have everybody else’s artwork on my walls (paintings & professional photos)? And now I frame my own photos and hang them on my walls and everybody gets to see them. Most importantly I get to see them and I really enjoy them! I would much rather see Lizzy dressed as a pirate on my wall being herself, than a staged studio shot that really does not capture who she is.
The next thing I thought was, why should I buy those coffee table books of photos when I can make my own with photos of places I have been to and of people I know and love? So now I do that. I of course love making my own handmade books and filling them with photos, but I also occasionally go online to the Kodak Gallery and make a more commercial looking book. I have added their link her to the right after “My Favorite Images” I made one for everyone in my husband’s family for Christmas one year of the new family Taco Bell. I also did one for Bryanna and Darwin of their wedding. You don’t need any special software or talent to do these books and you can “make” just one and have as many printed as you want. A real time saver for gifts.
Speaking of software. . .
If you have PhotoShop Elements or any other photo editing software, learn to use it. Have fun and just play with it until you get the hang of it. There are lots of books out on the market and college classes you take on how to master the software too. Now your creative juices can run wild! Not only can you edit your photos for size, color and contrast, you can add text, merge photos together and make special effects. I love to make posters and collages in PhotoShop. As well as proof sheets and book pages with text. (To the right, after Photo Gallery Links, I added a section for tutorials. There is a great link there for all kinds of tutorials on PhotoShop)
 One of Vittoria's Proof Sheets.
A 12x24 Poster I made
If photo editing software intimidates you right now, take advantage of the editing available at the lab you use, They all allow you to edit for size, color and contrast. And most of them have a good selection of special effects and borders you can add to your images. Some even have a text option.
In Summary. . .
Thank you all for taking this class. I hope you all enjoyed our three Saturdays together and that you went away feeling as though your time and money were well spent.
Mostly I hope you learned . . .
1. To keep your camera out and to use it!
2. To shoot what you love!
3. To get up close and personal with your subjects!
4. And to print and display your images!
Be sure to keep checking out the blog, I will keep it updated.
Quote of the Day
To me, photography is an art of observation. It's about finding something interesting in an ordinary place... I've found it has little to do with the things you see and everything to do with the way you see them.”
- Elliott Erwitt
P is for Photo!
Hello ladies, how was your weekend? Did you all show off your completed books to your family and friends? I hope you are all very proud of your books and your photos. You all did a great job and I loved seeing all of your different subjects for your photos.
We talked about doing another class with a new book and a new assignment and I came up with this yesterday. . .
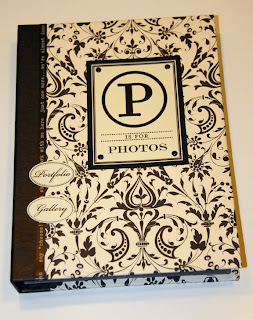
Let know what you think? I will be showing it to Kathie on Tuesday to see if we can get it on the shedule for June. I am showing you the book ahead of time but not telling you the assignment. That will have to be a surprise! Click on the photo of the book to see the inside pages. You will see there is room for two different assignments in there.
Don’t put your cameras away - keep shooting what you love and capture some memories for yourself!
M
PS - I will be getting the notes from Saturdays class up in a day or two so check back.
Quote of the Day:
Photography is a way of feeling, of touching, of loving. What you have caught on film is captured forever... it remembers little things, long after you have forgotten everything.”
- Aaron Siskind
Saturday, April 12, 2008
Session Two Class Notes and Homework
Session Two Notes:
Discussion: This week we are going to talk about Composition. So, let’s get started.
Composition is simply what you have decided to include and leave out of any given photo. Ultimately composition is the organization of a subject within a frame. It’s the subtle layout of key elements that can make a good photo great! Learning a few basic rules can help you understand why you like a photo, and then how to help you make it happen again when you are behind the camera!
The Five S’s of Composition -
1. See the Possibilities: Stop and look at the things and the people you surround yourself with. See what is unique about them. Now think about all of the different ways you look at them - now capture them in all of the ways we just discussed -
Their uniqueness (button nose, crocked smile etc)
From above and below
From far away and close-up
From the front and the back
And from all sorts of angles
Before you get started lets review a couple of good rules of composition here
A. THINK VERTICAL when shooting people. People are taller than they are wide, so shoot them that way! Even when you are just shooting someone’s face , turn your camera. Faces and bodies have very strong vertical lines. If you turn your camera and shoot vertically you will find it much easier to “fill your frame” and you will get stronger, better images.
This is a good rule for “things” too. If it is taller that it is wide, shoot it vertically (what they call portrait). If it is wider than it is tall, shoot it horizontally (what they call landscape).
B. IT’S ALL A BALANCING ACT! If you are cropping tightly at the top, do the same at the bottom or your subject will appear to be floating out of the top. When you are photographing a person (or object with a definite top & bottom) full length, be sure to leave more space above their head than below their feet. Otherwise they will appear to be floating in space.
C. DON’T GET ALL OUT OF JOINT! Be careful not to crop photos of people at their joints (elbows, wrists, waist & knees). Doing so will make them look as though they are missing parts. Crop above or below the joints.
D.THE EYES HAVE IT! The most expressive part of the human body is the face. And the most expressive part of the face are the eyes. Pay close attention to your subjects eyes. If you make a mistake with the nose or mouth it is not as big a deal as messing up the eyes. Watch for the little reflective lights in people’s eyes, these are called catch-lights. These will illuminate the eyes and make your subjects face look more alive and sparkly.
2. Subject: Learn to really emphasize the subject you are shooting! We talked a lot about this last week, let’s refresh. . . How do we really emphasize our subject?
By filling the frame - making it clear to your viewers who or what your subject is. Getting up close and personal does 2 things
It simplifies your image
It emphasizes your subject
By deciding what our photographic style goal is here - do we want to merely document our subject or do we want to give them that universal appeal and capture the essence of our subject?
3. Simplify: Practice simplifying your images by observing how lines, shapes, scale, viewpoints and the Rule of Thirds influence your images.
In 1. See the Possibilities we talked about lines and how they affect our images. Now let’s talk about Shapes, Scale, Viewpoints and the Rule of Thirds.
The Rule of Thirds - is based on the concept that the strength of an image improves when the main parts of the photo are placed in key locations away from the center of the frame. Placing the subject away from the center creates visual tension because it is not the way we usually see things.
How’s that for a definition! You will probably never shoot a photo thinking “now, I need to cause some visual tension by placing things on an imaginary grid, so that they wont be viewed the way I look at them with the naked eye”. BUT, when you capture an image that really POPS, it almost always has followed this rule.
Picture your frame segmented into thirds, both horizontally and vertically like a tic-tac-toe board (so you will have 9 equal boxes). If your subject falls perfectly centered you will might find yourself with a boring, so-so photo. To spice it up, move your subject onto one of those imaginary lines, or even where they intersect.
When composing a portrait, it is a good idea to keep your subject’s head (or in close-ups, the subjects eyes) on or near an intersection.
I have made you each a “Rule of Thirds Grid” to take home and use. It will fit on any 4x6 photo, in either landscape or portrait format. Use this grid at home to check your printed photos.
Shapes - Shooting groups can be one of the most challenging of your photographic ventures. When you are shooting a group of more than two people or things you need to think about the “shape” they make when they are together. Triangles are particularly pleasing and easy to achieve. Professional photographers tend to put the most significant subjects in the center and build out from there. But since we are not professionals and we want pictures with “heart” in them, you can start out traditionally and then just allow them to interact with each other. Try to resist the urge to make them all look directly at the camera and say cheese! Professionals also discourage lining people up - they call this the firing squad method. Thankfully, again we are not professionals. Depending on how you position your subjects, a line-up might be just the thing. Think of lining them up in birth order, not just by height. Also sometimes you can line up just parts of them and tell a whole story. Think of a a family portrait of just bare feet. From the worn and big grandpa to the soft and tiny of the newest addition.
Scale - The size or scale of your subject is very important in the composition of your photos. Scale is simply the relationship between the size of at least two elements. If you want to draw attention to the size of your subject, add another element or person that will visually illustrate how big or small your subject is. This is much like when a catalog will show a dime next to an item they are selling so you know how big the item really is. A dime certainly wont help you draw attention to the size of your toddler so try some of these tricks. . . Stand her on a dining room chair. We all understand the size of a dining chair, and standing her on it reminds us how small she is. Or maybe take that same toddler and stand her in front of her father’s legs, shooting only her (remember she is your subject) and the legs of her father (there is no need to see his face, it is understood why he is there). When shooting outdoors let nature provide your scale for you - use trees and boulders and whatever else you see.
Viewpoint - this is the point from which you literally are standing as you view your subject. Where you stand is not always the best place from which to take your photo. For example, if you are 5’5” tall and take all of your pictures from a standing position you are going to get the same viewpoint on everything you shoot. This will all add up to some pretty boring photos. So try this, bend down. Lay on your stomach, lay on your back, stand on your tip toes, climb up on a chair or table. Just move yourself into new and different positions so that you can see things in a new and different way.
Here are 4 tips on how your viewpoint affects your subject:
Shooting up at a subject gives a sense of power to your subject.
Shooting down at your subject gives a feeling of innocence or vulnerability to your subject.
Shooting at the subjects eye-level give a sense of equality.
For a more commercial look to your photos, try tilting your camera. Look for a dominate line in the photo and tilt your camera either towards or away from that line.
4. Setting: Figure out how to exploit the setting for the best possible image using the location, background and any props. As hard as it is, try not to covet other people’s locations. It is way too easy to fall into the “if only” trap. If only I lived near the beach, If only I lived in a place that had great old barns, or Victorian houses or___________, you fill in the blank. Remember you are shooting from your heart and you do not need these settings to make great photos that mean something to you. Instead look around you at your surroundings. This world is full of wonderful things and places. It is full of colors and textures. Yes, even here, where you are! So start looking differently at your own neighborhood and the places you drive past everyday. Once you really start looking you will find so many interesting places to shoot your photos, that you will have to make a check-off list so that you get to them all!
Here are some places for you to start - or at least to consider and get your own creative ideas goings:
Downtown Phoenix! There are old buildings, wonderful architecture, parks and statues. St Mary’s Basillica is a great place - but be respectful. There are old Victorian homes being restored down there and old schools as well as lots of new buildings. It is full of color and texture and a sense of excitement lives down there.
Lake Pleasant (or Bartlett Lake, or Saguaro Lake, you choose) Here you will find lots of color, lots of water, and lots of great lighting. The Marina is full of boats that make a wonderful and exciting backdrop to your photos. There is a ton of plant life and even some “beaches”.
New Housing Developments are a great place to go! Often our new developments put in beautiful parks and green belts. They also offer wonderful water features in some like fountains, ponds and waterfalls.
Model Homes are really cool! They are usually furnished to the nines and have big open windows that offer great natural lighting indoors. A lot of them have beautiful pools and patios too - its like having a million dollars worth of props at your disposal for free!
Our endless deserts! Wow - you are only minutes away from the desert where ever you live here! There you will find so much texture and even color. Look for old saguaro skeletons, dry washes and mesquite trees. Maybe you will even find some old bones! But be sure to take water with you no matter what time of year it is.
Papago Park is a great afternoon of picture hunting. There you will find the most beautiful rocks to use as backdrops, as well as cactus and other plant life. While you are there, stop by the Botanical Gardens or the Zoo.
The Borgata Shopping Center in Scottsdale is another great place to use as a setting. Great courtyards and textured walls.
The Big Resorts in town, Big resorts equal big pools, big landscaping and big, beautiful lobbys!
Watch the side of the road as you drive from here to there. Now that it is Spring, wildflowers will start popping up everywhere. And if you “fill your frame” like I taught you it will look like you are in a field of flowers instead of just on the side of the road!
Okay - you get the idea now. Just open your eyes to see things in a whole new way.
Now that you have learned to look for the perfect setting around you, it is time to learn how to “Make” the perfect setting when you need to. I keep a Prop Bucket in my garage at all times. It is easy to grab and put in the trunk of my car if I need too and is handy at the house when I need it there too. Here’s all you need to start your own Prop Bucket:
Rubbermaid Tub
1 Black and 1 white Queen Sized sheet
(2) 99cent clamps from Home Depot
That’s really all you need, but it is fun to add more stuff as you find it. I like to keep some netting, tulle or gauze from he fabric store or Walmart (check the bargain table). I also watch the end of season sales for big holiday and seasonal props at 50% off to use the next year. I keep some silk flowers in there and a $5 garage clamp light just in case. It is all very inexpensive and easy to come by. It just takes a little imagination and thought, but you will be amazed at how glad you will be to have it when you need it!
5. Share the Story: When an author writes his best seller he uses words to paint pictures in our minds. As we read the words he has written we can see the story unfolding, we can see where the subject is, what he is doing and sometimes even smell what he smells. The author does not just merely tell us who, what, when, where and why and expect us to be engaged. He tells us the whole story. He shares the feelings his subject has, What his world looks like, what he looks like. He gives us all the minute details so we can truly engage with his subject.
As a photographer you need to strive to do the same, only in reverse. You need to use your pictures to write words in your audience’s mind. You need to tell the story in all of it’s minute details with your images. This is what will make your viewer become engaged in what you have to “say” with your image. To do this you need to show relationships between people and make use of all of the symbols in life - things like precious pieces of jewelry passed down from generation, worn and tattered blankets that your children still love and carry with them, Shoes covered in mud from a hard day’s work. Street signs that tell us where you are going or maybe where you have been. When we see these relationships unfolding and see the importance of the symbols you have chosen to include in your images, and they are composed well we will start to concoct a story of our own. So even if we do not know the people or the symbols personally, if they are organized well within the image and the emotion is captured along with them they will still tell a story.
This is a very hard thing to do. I dare say it is harder to turn pictures into words than to turn words into pictures. But it is well worth the effort when you get that one photo that speaks volumes.
Session Two Homework Assignment - Same Subject Composure
This week I want you to concentrate on the rules of composure we have discussed. I want you to pick a single subject (living or inanimate) and shoot your subject in the same basic setting in the ways listed below. Have all 12 photos printed at the lab of your choice in 4x6 format. You may choose matt/luster or glossy prints - it is your choice. Or you might want to mix it up a bit and print some in each. Label the backs of your prints with your name and how the photo was shot (high angle, etc). Be sure to bring these prints with you to class next Saturday (the 19th).
*Wide angle and close up
*Vertical (portrait) and horizontal (landscape) orientations
*Smack in the middle of the frame and off to one side
*From a high angle (looking down) and from a low angle (looking up)
*From the front and from the back
*Just a part of them - not the whole subject
*Now with a prop or symbol that tells us something about your subject
All of this is meant to help you see the same thing in several different ways and to help you organize and simplify the items in your images. This homework assignment will probably be more challenging for you than the last one, but don’t give up. Take the time to plan out what you want to shoot and how you will execute each of the shots. This might be a great time to take a drive to one of the places I talked about and just make an adventure out of your assignment. However you choose to do it, have fun and enjoy the process!
Quote of the Day
To me, photography is an art of observation. It's about finding something interesting in an ordinary place... I've found it has little to do with the things you see and everything to do with the way you see them.”
Elliott Erwitt
To me, photography is an art of observation. It's about finding something interesting in an ordinary place... I've found it has little to do with the things you see and everything to do with the way you see them.”
Elliott Erwitt
Friday, April 11, 2008
TGIF!
Well Girls the week is over and tomorrow is class! Do you all have your homework assignments completed and ready to share with the group? I really can't wait to see what you all have come up with and how you interpreted each of the words!
Be sure to lable your prints and bring your favorite photo adhesive with you to class tomorrow.
See ya then
Ciao,
M
Be sure to lable your prints and bring your favorite photo adhesive with you to class tomorrow.
See ya then
Ciao,
M
Quote of the Day
Great photography is about depth of feeling, not depth of field.
Great photography is about depth of feeling, not depth of field.
- Peter Adams
Thursday, April 10, 2008
Happy Hump Day!
How are you doing today girls? Are you working hard on your assignments? There are only 3 days until we share our photos with each other. Are you excited? I know I can't wait to see what you all came up with for your 20 words!!!!
I spent the day behind my camera today as well. I went out with Lizzy to work on her Photog Class Final. We had a GREAT time! Look at how hard she works to get the perfect image.
 Well - good luck with your homework - and be careful if you need to climb a fence to get that "perfect shot"!
M
I spent the day behind my camera today as well. I went out with Lizzy to work on her Photog Class Final. We had a GREAT time! Look at how hard she works to get the perfect image.
 Well - good luck with your homework - and be careful if you need to climb a fence to get that "perfect shot"!
M
Sunday, April 6, 2008
Hello Gals. . .
Well, did you all enjoy class today?
Do you think you learned anything?
Are you inspired to start your homework?
To the right here you will find some of my favorite photo gallery sites if you want to use some of them for your "Finding Your Style" assignment.
I wanted to let you know that all of your portraits that I took after class turned out great! What a photogenic bunch you all are!!!!
I also wanted to applogize to you all - I told you I would post photos of my whole homework album here for you to look at and I realized I only took a couple of photos of it. But here are the ones I have - sorry. The album is at the store so I can't even take anymore for you. I hope these help.


 Well, it's late and I am heading to bed. I hope you all have a GREAT week and that you have TONS of FUN shooting your homework assignments! Feel free to email me if you have any questions.
When you use a camera, not as a machine but as an extension of your heart, you become one with your subject. - Anonymous
Do you think you learned anything?
Are you inspired to start your homework?
To the right here you will find some of my favorite photo gallery sites if you want to use some of them for your "Finding Your Style" assignment.
I wanted to let you know that all of your portraits that I took after class turned out great! What a photogenic bunch you all are!!!!
I also wanted to applogize to you all - I told you I would post photos of my whole homework album here for you to look at and I realized I only took a couple of photos of it. But here are the ones I have - sorry. The album is at the store so I can't even take anymore for you. I hope these help.


 Well, it's late and I am heading to bed. I hope you all have a GREAT week and that you have TONS of FUN shooting your homework assignments! Feel free to email me if you have any questions.
Quote of the Day
When you use a camera, not as a machine but as an extension of your heart, you become one with your subject. - Anonymous
PS - below this post you will find the homework assignment and the notes from this week.
Friday, April 4, 2008
Session One Homework Assignments
Homework Assignment - Finding Your Style
Collect images from magazines, on the internet, newspapers and even photos you have. Choose images hat speak to you and grab your attention. Now that you have your stack of images lay them all out. Grab a pad of post it notes and a pen and answer the following questions about the images you have collected:
1. Do you have an emotional connection (good or bad) with the photo?
2. Does it relate anything about the human condition or our common experiences?
3. Does the photo say more to you than who, what, when, where?
If you answered yes to 2 or more of these questions then you are looking at an Interpretive image.
Now that you can identify if they are mostly Documentation Style or Interpretation Style, look at them again and ask yourself these questions:
1. Are they more formal or casual?
2. Are they Black & White or color?
3. Do they show relationships?
4. Do they show the big picture or the minute details?
5. Can you identify what you love about them?
Answering all of these questions will help you define your own style and help you develop your critical eye. A Critical eye is a photographers most important tool. This is something that might not be natural to all of us but can be developed. You might want to save all of the images you collected for this exercise with their post its attached in a 3 ring binder for further reference. Add to your binder when you find an image that speaks to you.
Homework Assignment - Scavenger Hunt
Below are 20 words that you will use for your homework this week. You are to use these words and turn them in to photographs. Have them all printed at the lab of your choice in 4x6 format. You may choose matt/luster or glossy prints - it is your choice. Or you might want to mix it up a bit and print some in each. Label the backs of your prints with your name and the word that is depicted in your photo. Be sure to bring these prints with you to class next Saturday (the 12th).
Most of the 20 words are a “feeling”, either an emotional feeling or a tactile feeling. You have total creative freedom to interpret these words the way you want to. Try to think outside the box a little, and try to capture some part of your heart or soul in these pictures. But the most important thing is to have fun and not second guess yourself. There is no right or wrong here.
Beginnings
Cold
Discover
Evening
Evening
Family
Food
Grow
Grow
Innocence
Life
Love
Love
Morning
Old
Riches
Riches
Sadness
Safe
Soft
Soft
Time
Tough
Wet
Wet
Words
Simply look with perceptive eyes at the world about you, and trust to your own reactions and convictions. Ask yourself: "Does this subject move me to feel, think and dream? Can I visualize a print - my own personal statement of what I feel and want to convey - from the subject before me?
- Ansel Adams
Heart & Soul of Photography Session One Notes
Introduction:
The equipment does not make you a better photographer, your vision, the techniques you use and practice will do that.
When Kathy first asked me to teach a class on photography my first response was NO! I am not a trained photographer and I could never answer all of your questions about the technical part of photography (i.e.: apertures, f-stops, white balance, etc). But Kathy assured me that was not the type of class she, or you wanted. Instead, she wanted me to help you learn how to put more interest, more heart if you will, into your photographs.
Preparing for this class was very hard for me. How would I put into words and teach you how I put the heart and emotion I like to have in my photos? I have come to realize that explaining my vision and heart is similar to explaining why you love someone. It is often difficult to put into words an emotional response. This class really allowed me to look at my own style and vision of photography in a new light and allowed me the opportunity to examine my true motives when I take a photo. I have discovered that the true foundation of my photography is capturing the “feeling” and not the image.
Discussion:
Shoot what you love and tell the story -
We all pull out our cameras on special occasions, like birthdays and Christmas. The rest of the time our camera sits in a drawer, on a shelf or in a protective camera case. We treat our cameras like we treat our good china. I have always lived by the rule that everyday is a special occasion! I keep my good china accessible and I use it whenever I feel like it. I eat pizza on it as well as holiday meals. It just makes me happy to do it - and I am worth it! The same goes for my camera. I keep it out and at hand everyday and I use it almost everyday. There is something special that happens everyday because I have a special family and I live in a special world. In other words I shoot the things I love and I tell their story with my images. My family and my world has many interesting stories to tell, And the stories don’t just happen on those “special occasions”. If you reserve your camera for just such stories, this is the story your photo albums will tell. . . We were always happy. We were always well dressed and clean. We lived in a world full of Christmas trees, cakes and balloons.
There is so much more to life than that!. Some of my favorite times and memories are when my kids were dirty, the house was a mess and our clothes didn’t match. These are the real stories and the ones that bring up emotions and feelings when we look at the pictures years later. These are the images that show relationships and how they grow and change.
Holiday and special occasion photos are often our worse photos anyways. We are trying so hard to be “in the moment” and also trying to catch the moment, and get the food ready that we don’t get great photos. I find that on Christmas morning I am so interested in watching my family open their gifts that I forget to pick up my camera and shoot. On the other hand, a random Tuesday morning in May I might take 30 photos of the dogs playing with a stick in the yard or Vittoria chewing on her foot. These are the photos I cherish, and the moments that are more easily forgotten than Christmas morning.
My challenge to you is to make a list of the people and the things in your life that bring you joy and go out and shoot them like crazy! Tell their story, and capture your feelings about them with your camera. Get your camera out and leave it in a central place in your home and use it!
Here is a list of some of my most favorite things to photograph. . .
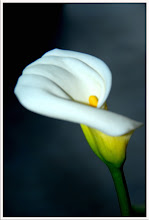
Vittoria - Lizzy - Gary - Bryanna - Calla Lilies - Anything Fall - The Sky - Storms - My dogs - Food - The Ocean - Point Loma - Trees/BIG trees - My Doodle’s things
Get up-close & personal -
One of the most common mistakes made when taking photos is not getting close enough! This is one of the hallmarks of my photography style. You might say I really “get in your face”. I want to see (and remember) what your eyes looked like, I want to capture that twinkle or that tear. I want to see all of the details of your smile, your fingers, maybe even your toes. I want to have all of these minute details saved forever.
Almost every camera, at every price point has some sort of zoom on it. Use it! Use it when you are close up to get all of those little details. Use it when you are far away so you can be that “fly on the wall” and capture moments and expressions without being intrusive or ruining the moment.
The basic rule of thumb here is Fill Your Frame! Actually open your eyes when you shoot, and look at everything that is in your viewfinder or on your view screen (note: get in the habit of checking the 4 corners of your viewfinder for distractions). Make sure everything that you want is in there and nothing else! This is what I call “identifying your subject“. When someone looks at your photograph for the first time, there should be no doubt as to what the subject is. They should not have to wonder if you were shooting a picture of a messy room, Bryanna or Vittoria on her first Christmas.
 By making Vittoria the largest part of your photo, you are leaving no doubt as to what your viewer’s focus should be on. Filling your frame in this way helps eliminate distracting backgrounds and things that have nothing to do with the story you are telling.
  So, get close, really close!
You can get closer 3 ways,
move your subject,
move yourself
or move your camera (the zoom).
Let’s take “filling our frame” a step farther and let’s look beyond the specifics of the subject and find the universal connection your subject has with all those that will view your photo.
The Specifics of a photo are what we call, Documentation Style photography. This style of photography answers specific questions about the subject, i.e.: who - where - when. It will give you specific information about a specific person, at a specific time, at a specific place.
Example: A full, straight on picture of a bride and her sister has specific qualities. It says “April helping Angie get ready for her wedding“. This photo documents that Angie was getting married.

The Universal Connection, is what we call Interpretation Style photography. Interpretation asks almost as many questions as it answers and allows the viewer to determine the answers. As well as asking questions, it tells a story and shares your emotions about the subject. It is also known as photojournalism.
Example: Now, lets fill our frame up with just Aprils hands as she laces up Angie‘s wedding dress. We have a universal connection here. We see things like “pure, beginnings, love, patience, help“. These are things that everyone can identify with. Things that make your photo interesting to everyone, even if they don’t know the bride or her sister. This photo allows your viewer to make their own interpretation of the photo and hopefully he/she feels your emotions.

A Picture is worth a 1000 words. . .
There are pictures. and then there are pictures that capture the heart of the moment. These pictures need little explanation. These pictures seem to speak a thousand words. We all want to have these types of pictures in our scrapbooks and albums. To have a photo that 'speaks' is the epitome of photography.
I love to capture moments with my camera. These moments are what I want to remember. Yes, I want to remember what my children looked like, and what our home looked like, and what presents they received on Christmas, but there is so much more to our life than that. Our lives consist of everyday things and daily memories. Our lives are full of seconds of inspiration, minutes of laughter, hours of fun, and days of simply being together. I want to remember these times when I look back at our family albums several years down the road. By simply using your camera to capture what touches your heart, you capture these types of pictures. Soon, what started out as just picking up your camera and snapping random shots, will evolve into something that means so much more to you.
When I first started taking pictures, I would just carry my camera to the important events, hoping to capture a few good shots of the day. Most of the time I'd capture the 'day', but few 'good' shots. When I became more interested in scrapbooking, I started to pay more attention to the pictures that I was taking. I became aware of exactly what I was taking pictures of. And you know what? I take MORE pictures now than ever before. I realized that I didn't have enough pictures that told the stories I wanted to tell. When I realized that, I made a decision NOT to put my camera away. Instead I leave it within reach at all times. I even bought a smaller one to carry with me for those unexpected “gotta have it” shots.
Photojournalism is simply expressing your 'journaling' through your photos. It's candid photography that captures the essence of the people, places, or things. It's more than a shot of child at a beach. It's a picture of that same child jumping up and running into the waves, splashing through the tide. That picture somehow brings back the smell of the salty water and the heat of the sun. That picture lets you remember the laughter and excitement of the day. That picture will speak a thousand words years from now.
A few tips to send you along your way to creating "talking" photos:
Get closer. To capture those little details, don't try to fill the camera lens with the entire subject and surroundings. instead, try filling your lens with what you want to capture.
Carry that camera with you. You never know when a moment to remember will happen.
Think about the day or event. What do you want to remember? If you want to remember the laughter, capture it. If you want to remember the relationships, capture them. Capture what you want to remember. This will be the 'essence' of the day.
Don't make your subjects look at the camera and say cheese. You'll get much more realistic and natural faces by just letting them do what they do naturally.
Now, go capture the moments!
Subscribe to:
Posts (Atom)